
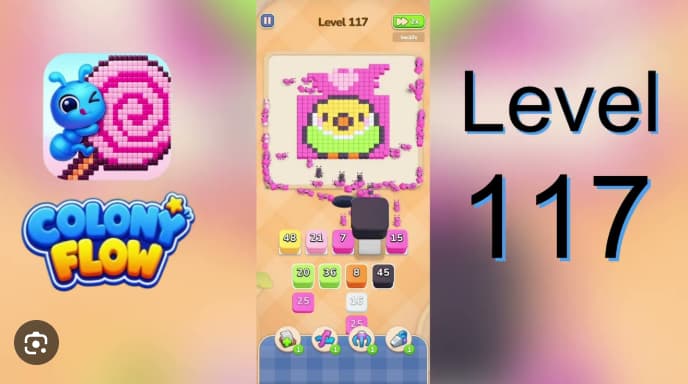














































































































































































Colony Flow Level 117 features a hooded cat-face portrait concealed behind a large pink shell, making it one of the trickier puzzles in the game.
This walkthrough breaks down the exact steps to reveal the hidden image and complete the level efficiently. The key challenge lies in identifying which flow paths need to connect first to shift the shell overlay.
Most players get stuck trying to solve the outer rings before establishing the core connections that unlock the portrait.
Colony Flow Level 117 Walkthrough
Colony Flow Level 117 is a perimeter-first puzzle built around a hooded cat-face portrait hidden behind a large pink shell. The board uses one ant hole shared by every color, so tap order determines success. Drain the pink hood completely before committing to the inner face colors or the late dark outline pieces. Start with pink 3, then work through pink 29, 30, 37, and the mid-size pink refills (43, 35, 24, 17, 10) to remove the hood, upper border, and heart frame.
Hold dark 9 even though it looks easy—playing it early clogs the route and strands hood cells. Once pink exposes the portrait, send green to fill the lower cheeks, then yellow for the face ring.
Drop orange 8 only after green and yellow are moving. Use white stacks for the muzzle after the cheeks and most of the yellow ring are set. Finish with dark 9, dark 5, and remaining dark waves to complete the whisker arcs and eye details.
How to Solve Colony Flow Level 117
Work from the outer shell inward. The pink opener establishes the route; face colors build the portrait; dark cleans up the final outlines.
-
Tap pink 3 first. Follow with pink 29, pink 30, and pink 37. Continue feeding pink refills as they appear: 43, 35, 24, 17, and 10. These waves clear the hood, top border, and heart frame.
-
Hold dark 9. It shares the same route pink needs. Tapping it early clogs the ant hole and leaves hood sections unresolved.
-
Send green for the lower cheeks. Once the pink shell exposes the portrait, green opens the lower-center lane needed by the next colors.
-
Place the yellow face ring. Yellow establishes the round inner outline. Let most of this wave move before dropping the center accent.
-
Use orange 8 late. Orange clears a small nose or beak detail, not the main route. Drop it after green and yellow are already flowing.
-
Place white for the muzzle. White works cleanly after the cheeks and most of the yellow ring are set. Early white placement parks pieces in the center and blocks cleanup.
-
Finish with dark waves. Play dark 9, dark 5, and remaining dark stacks last to complete the whisker arcs, eye details, and side outlines. Clear any remaining pink, yellow, or white cells.
The level ends when the pink hood is gone and the final dark outlines lock the completed cat face.
Tips for Colony Flow Level 117
- Reserve the ant hole for pink. The long pink opener reveals and stabilizes the inner portrait route.
- Do not tap dark 9 or dark 5 early. Dark is reserved for final facial outlines. Early dark placement blocks pink and later cleanup paths.
- Follow face-building order: green cheeks, yellow ring, orange center accent, white muzzle.
- Let green and yellow establish the shape before orange and white enter the middle.
- Check top corners before finishing. Small pink hood cells and tiny yellow or white facial cells can remain after larger waves clear.
Full Tap Order for Colony Flow Level 117
- Pink 3
- Pink 29
- Pink 30
- Pink 37
- Pink refills: 43, 35, 24, 17, 10
- Green cheek stacks
- Yellow face-ring wave
- Orange 8
- White muzzle stacks
- Dark 9, dark 5, remaining dark outline waves
This sequence preserves the single ant-hole route, clears the pink perimeter efficiently, and saves dark whisker arcs for final cleanup.
Related Games
- Colony Flow Level 37 Walkthrough — Use this additional Colony Flow guide to practice the color-order and single-route planning needed to avoid clogging Level 117’s ant hole.
Why Does Dark Fail Early in Level 117?
Dark only clears small late facial accents and side whisker arcs. If dark enters while pink still owns the perimeter or before white and yellow open the center, those tiny waves clog the route and delay shell cleanup. The dark 9 and dark 5 stacks look like quick early taps, but they strand the remaining hood cells by blocking the only path pink refills can use.