














































































































































































Colony Flow Level 80 Walkthrough guides you through one of the game’s trickiest puzzle stages, where managing resource flow between colonies becomes significantly more complex than earlier levels.
This level introduces multi-path routing challenges and tighter timing constraints that can stump even experienced players. This walkthrough focuses on the core mechanics you need to clear Level 80: optimal colony placement strategies, flow prioritization when resources split between multiple paths, and the specific sequence that prevents bottlenecks.
You’ll find practical solutions for the three main chokepoints and a reliable approach that works consistently without requiring perfect timing.
Colony Flow Level 80 Walkthrough
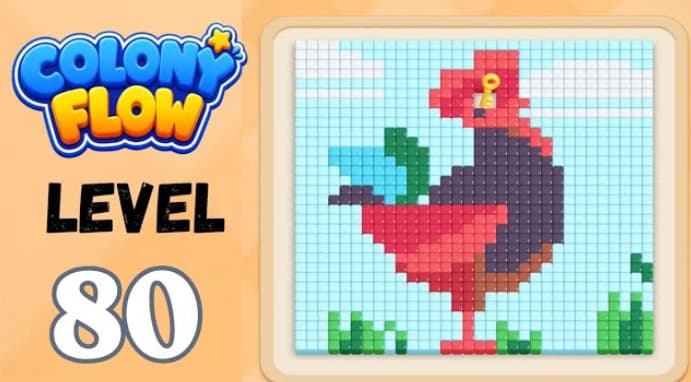
Colony Flow Level 80 is a roster-silhouette puzzle where cyan sky, red crest, white edges, pink belly, and heavy black torso share one center trail. Clear the small detail colors before the black body floods the middle chute. Start with the smallest cyan stack to open the sky from the lower edge, then send one red crest wave while traffic is light.
Release a white edge-detail stack next, followed by the first large black body wave only after cyan, red, and white are moving. Clear the pink belly immediately after—it shares routes with later black stacks. Finish with remaining black, green, and yellow cleanup to drain body edges and grass tufts.
Step-by-Step Solution
-
Tap the smallest cyan stack first. Clear the pale sky from the lower edge to open space on the shared route.
-
Release one red crest wave. The head detail needs the center chute before torso traffic arrives.
-
Send a white edge-detail stack. Clear it before the black body crowds the path.
-
Release the first large black body wave. Send the torso only after cyan, red, and white are moving.
-
Clear the pink belly fill immediately after. Pink shares routes with later black stacks—do not save it for the end.
-
Finish with remaining black, green, and yellow stacks. These clean up body edges and grass tufts once the main torso flow is stable.
Common Mistakes to Avoid
Opening black too early. Releasing the heavy black torso before the cyan sky and red crest clear pins the small detail colors behind it. Black occupies the whole middle chute, trapping red crest, pink belly, and white edges. Move small colors first, then let the black body flow through.
Saving pink belly until the end. Pink uses the same center route late black cleanup stacks occupy. Clear it right after the first black body wave.
Tips for Colony Flow Level 80
- Keep the center trail open for detail lanes. The small cyan sky and red crest need that space despite their size.
- If progress stalls, use the clearest available path instead of forcing another large fill into a busy route.
- Colors affect one another—cyan, red, pink, black, green, and white share key paths throughout the board.
Related Games
- Colony Flow Level 40 Walkthrough — After using cyan and red openers to prevent Level 80’s black torso route from clogging, this guide offers another Colony Flow puzzle for practicing careful color-release order.
Enjoy!