
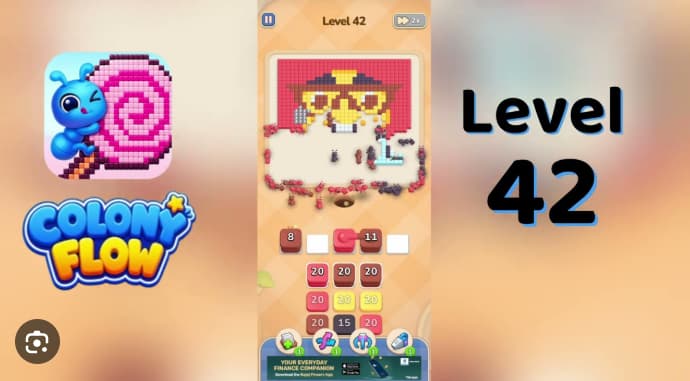














































































































































































Colony Flow Level 42 is a bearded character portrait puzzle where the red hat and beard, the yellow face, and the tiny black eye details all share one continuous trail.
The challenge lies in timing: black stacks must wait until the larger red and yellow waves have already opened up the face structure. This walkthrough breaks down the solve sequence, showing you how to layer each color so the full portrait flows correctly from start to finish.
You’ll find specific trail routing, color stacking order, and the exact timing windows that prevent common mistakes.
Colony Flow Level 42 Walkthrough
Colony Flow Level 42 is a bearded pixel-art portrait where red (hat and beard), yellow (face), and black (eyes and eyebrows) share one dirt path. The red outer area must open first, then yellow, then black. The empty white buffer slot in the second active-row cell stays untouched until late refills land.
Opening sequence:
- Tap the red 3 (fourth active-row cell). Wait for the ant to reach the bottom edge of the portrait.
- Tap the yellow 10 (fifth active-row cell). Leave one beat after the red3.
- Tap the red 20 (first active-row cell). Let it clear at least half the hat and upper beard.
- Tap the yellow 20 (third active-row cell).
Source row 1:
- Tap the black 15 (first cell) after the red 20 wave has opened the hat.
- Tap the yellow 20 (second cell), then the yellow 20 (third cell), leaving one beat between each.
Source row 2:
- Tap the three red 20 stacks left to right, one beat apart.
Source row 3:
- Tap the red 10, then yellow 20, then red 20, one beat apart.
Late refills:
Tap the yellow, black, and red refills as they rise into the active row, one beat apart. Yellow clears remaining face cells, black clears remaining eye and eyebrow pixels, red clears remaining hat and beard cells.
Quick Tips
- Open red first. The hat and beard form the outer barrier around the yellow face and black details.
- Use small stacks before large stacks. The red 3 and yellow 10 create room for heavier waves.
- Leave one beat between colors. Red, yellow, and black share one trail. Launching too quickly stalls the path.
- Protect the white buffer slot. The empty second cell is needed for late refills. Do not tap it.
- Hold black until the face opens. The black15 clears eye and eyebrow pixels enclosed by red and yellow. Send it only after the red20 wave has started clearing the hat.
Common Mistakes
- Firing black 15 too early. Sending black before the red 20 and yellow 20 active-row waves have started clearing strands black ants on remaining face cells and blocks late black refills.
- Tapping yellow 20 stacks while red ants walk the path. This strands yellow ants on remaining face cells and blocks the yellow 39 refill.
- Filling the white buffer slot early. A stray tap before late refills rise strands ants on the path and blocks small black and yellow refills behind active red ants.
How Colony Flow Level 42 Works
Tap a numbered cube stack to send ant along the dirt path toward its matching color hole. The number indicates wave size. The color determines which portrait section clears:
- Red removes hat and beard
- Yellow removes face and highlights
- Black removes eyes and eyebrows
- White marks the empty buffer slot for refills
Level 42 requires timing and access management. Smaller stacks open the route, larger stacks clear the portrait, source-row waves finish remaining groups once the path has space.
Related Games
- Colony Flow Level 24 Walkthrough — Continue practicing the color-stack timing and shared-path routing needed to avoid blocking later ant waves.
- Colony Flow Level 23 Walkthrough — This nearby Colony Flow puzzle offers another focused route-planning challenge for players applying Level 42’s staged tap-order strategy.
- Colony Flow Level 22 Walkthrough — Use this walkthrough for another level-specific solution when managing refill stacks and preserving open active-row slots.
Which Opening Tap Keeps the Path Clean?
Start with red 3 (fourth active-row cell), then yellow 10 (fifth cell), then red 20 (first cell), then yellow 20 (third cell). This clears the red hat and beard, yellow face highlights, and main face wave before the black 15, source-row yellow 20 stacks, source-row red 20 stacks, or late refills enter the path.
Tap black 15, source-row yellow and red stacks, and late refills only after the red 20 active-row wave has started clearing the upper hat.