














































































































































































Colony Flow Level 133 Walkthrough guides you through one of the trickier stages in this connect-the-dots puzzle game, where you need to link matching colors across the grid without overlapping paths.
Level 133 introduces tighter spacing and more colors than earlier stages, making it easy to box yourself into dead ends if you don’t plan your flow routes carefully. This walkthrough focuses on the optimal path sequence and which color pairs to connect first, so you can clear the board without restarting multiple times.
You’ll find the exact starting moves, critical junction points where most players get stuck, and a step-by-step solution that fills100% of the grid.
Colony Flow Level 133 Walkthrough
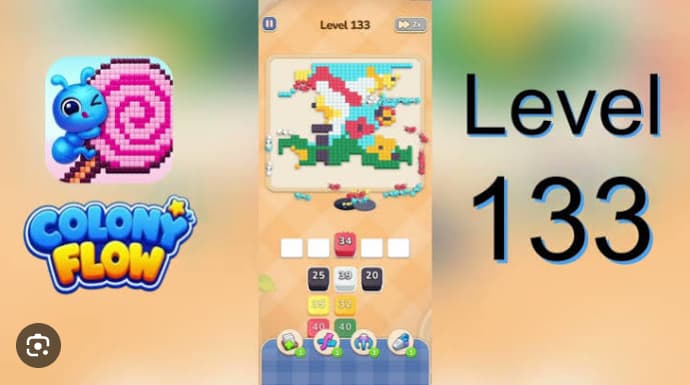
Colony Flow Level 133 is a garden-bird board where the sky, ground, and bird-body lanes must open together because the red hat, flower petals, and white cloud dots all share a single ant hole. The opener is mixed rather than color-stacked: yellow 13, pale 26, green 17, red 26, and green 21 are already loaded, letting the first body lane, sky strip, and ground edge start draining at the same time.
The board clears when the broad cyan sky wall, yellow bird silhouette, green grass, and dark contour pieces drain in parallel. Playing the bright red or pink upper-right accents too early clogs the route before the field and sky are stable.
How to Play Colony Flow Level 133 - Step-by-Step Solution
-
Play the mixed opener: feed yellow 13, pale 26, green 17, red 26, and green 21. This opens the bird body, sky strip, and lower grass route together.
-
Push the main sky and body lanes: bring in cyan 45/40 alongside yellow 35/30. Shrinking the cyan sky wall while advancing the bird silhouette prevents either area from isolating.
-
Keep the dark contour family moving: add dark 25 and continue using later dark fragments through midgame. These pieces clear the bird outline, legs, and lower grass edge before they strand.
-
Delay the upper-right accents: save red 40 and pink 38 until the green stems, ground strip, and cyan sky lane are already active. Playing them early parks ants in upper-right pockets and blocks the cyan route.
-
Clean up in order: finish the remaining cyan wall pieces with the tiny white cloud dots and dark edge fragments once the larger sky, ground, and bird routes are mostly drained.
Tips and Strategies
- Balance all three regions early. The bird body, sky, and lower ground need to move together rather than in separate phases.
- Do not front-load red or pink. Hat pieces and flower petals share the single ant-hole route with later cloud cleanup.
- Pair cyan with yellow in early midgame. Cyan 45/40 and yellow 35/30 work best together, keeping the sky wall and bird silhouette open.
- Use dark pieces before late cleanup. Dark 25 and later dark stacks protect the bird outline, legs, and grass edge from blocking behind smaller fragments.
- Leave white cloud dots until the end. They clear more safely once the larger cyan and green lanes have drained.
Common Mistakes
- Sending bright red or pink petal waves before the sky and ground are moving, which clogs upper-right pockets and slows the broad cyan wall.
- Ignoring the dark outline until too late, which leaves the bird edge and grass contour with stranded cells.
- Treating the upper decoration as the opener instead of opening the field and silhouette first.
Related Games
- Colony Flow Level 35 Walkthrough — Continue with another mid-game Colony Flow board guide to apply the same lane-management approach of balancing large color regions before committing to small accent pockets.
- Colony Flow Level 40 Walkthrough — This later-level walkthrough is a useful next stop for players practicing the Level 133 priority of keeping background, outline, and ground routes open simultaneously.
Enjoy!