
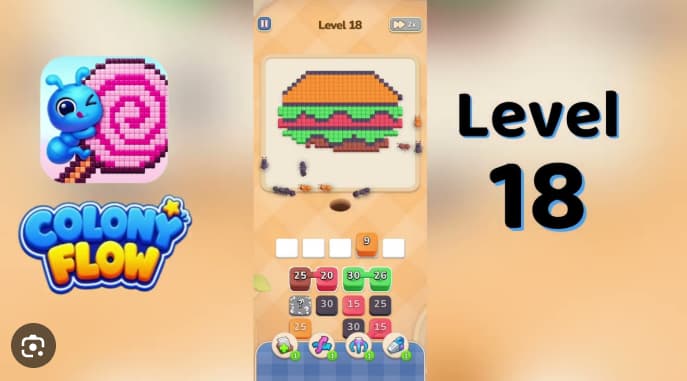














































































































































































Colony Flow Level 18 is a hamburger-themed puzzle board where every colored layer—dark outline, orange buns, green lettuce stripe, brown patty, red tomato band, and tiny sesame-seed cells—must flow through a single ant hole.
This walkthrough breaks down the exact sequence and timing needed to clear all six layers without blocking the path or leaving cells stranded. The key challenge is managing the narrow bottleneck while keeping faster-moving colors from overtaking slower ones.
You’ll also find practical tips for handling the sesame-seed cells that easily get trapped behind larger groups.
Colony Flow Level 18 Walkthrough
Colony Flow Level 18 is a hamburger board where dark outline, orange buns, green lettuce stripe, brown patty, red tomato band, and sesame-seed cells all route through one ant hole. The solution requires opening the dark perimeter first, then releasing each color wave in refill order while preserving buffer space for the next stack.
Start with the 19 black in slot 1 to establish the outline route. Once black ants begin clearing the dirt strip, tap the 26 red in slot 2 to start the tomato band. Drain the first refill wave—33 black / 25 brown / 11 cream / 15 cream—in order. Black extends the outline, brown fills the patty, and cream delivers the top-bun sesame seeds.
Continue with 17 black, then 23 brown. When the next refill lands, tap 14 black / 12 red / 20 red / 24 red in sequence. These stacks advance the outline and push the tomato toward half-fill.
How to Play Colony Flow Level 18
Tap 19 black in buffer slot 1.
Black ants clear the dark outline around the bun, patty, lettuce, and tomato. Wait for the first wave to move down the dirt strip before the next tap.
Tap 26 red in slot 2.
Red ants start the tomato band. The black route should already be open to prevent red cubes from stalling on uncleared bun edges.
Tap the first refill: 33 black / 25 brown / 11 cream / 15 cream.
The second black wave extends the outline, brown fills the paty, and cream clears the sesame seeds. Keep slot 5 open for the next wave.
Tap 17 black, then 23 brown.
This closes more of the outline and paty while exposing the green lettuce area.
Tap 14 black / 12 red / 20 red / 24 red.
The outline continues and the tomato band reaches roughly half-fill. Hold green stacks until red has space.
Tap 10 dark / 10 orange / 14 red.
Dark closes the bottom-bun outline, orange starts the curved bun edge, and red adds another tomato wave. Leave buffer slots open for the next refill.
Tap 9 red / 19 green / 23 green / 24 red.
Red clears the last tomato cells, green fills the lettuce stripe and corner accents, and the second 24 red handles remaining tomato accent cells.
Tap late refills one at a time.
Tap 1 green before 5 orange to keep corner accents moving. Then continue with 4 red / 1 green / 5 orange / 8 red / 27 red / 3 green / 18 brown / 3 dark / 8 orange / 12 dark / 19 green / 24 red / 3 dark / 16 brown / 7 orange / 1 orange, leaving one beat between each tap. The board clears once the last orange cube routes off.
Common Mistakes
-
Firing 26 red before 19 black is running. Red ants reach bun edges that have no outline and stall the first red cubes.
-
Tapping 10 dark and 10 orange back to back. Orange ants land on bun edges the dark outline has not yet cleared, stranding the 19 green / 23 green refill pair.
-
Parking red, orange, or green cubes in empty buffer slots while black or brown waves are mid-routing. This strands the next refill before it can rise into the active row.
Quick Tips
- Open the dark outline first. Black cubes establish the perimeter route and give later colors landing space at the shared ant hole.
- Treat red as a long-running job. The tomato uses several red stacks across the middle band and accents. Keep red moving in order, but only after black has started clearing.
- Clear cream stacks when they appear. The 11 cream and 15 cream waves fill the top-bun sesame seeds. Leaving them in the buffer can make the board look nearly complete while a few cells remain.
- Protect open buffer slots. The five-cell row is needed for fixed refill waves. Avoid filling available slots with unrelated colors while black and brown ants are still draining.
- Use one-beat spacing for late stacks. Tap a stack, wait for its ants to leave the route, then tap the next. This prevents jams during mixed red, green, orange, and dark refills.
Key Challenges
The main challenge is managing one shared ant path while the hamburger opens in stages.
Do not send red before the black perimeter is moving. The 19 black stack should clear the outline before the 26 red begins the tomato band. Otherwise red cubes stall along bun edges.
Keep room for the 14 black / 12 red / 20 red / 24 red refill. If the buffer is crowded when this wave arrives, the next stacks cannot rise cleanly.
Delay green until red has space. The 19 green / 23 green / 1 green stacks share the route with the tomato band. Let red waves settle first, and tap the small 1 green before the late 5 orange.
Avoid rapid tapping during the final mixed wave. The last bun, patty, lettuce, outline, and tomato cells can jam if multiple stacks release at once. One stack per beat is safer.
Related Games
- Colony Flow Level 17 Walkthrough — Continue with Level 17 for another nearby buffer-routing puzzle that reinforces the color-order timing used in Level 18.
- Colony Flow Level 19 Walkthrough — Move on to Level 19 after clearing the hamburger board to follow the next stage’s ant-stack sequence and refill management.
Which opening keeps Level 18 clean?
Start with the 19 black stack in slot 1, then the 26 red in slot 2 on the next beat. Opening with the dark outline lets the first ant wave clear the dirt strip before the red tomato flood starts. The tomato band is the largest single color region on the hamburger and needs the outline already running. The 33 black / 25 brown / 11 cream / 15 cream refill then rises into the buffer and should be drained in order so the patty and sesame seeds come in alongside the outline.