
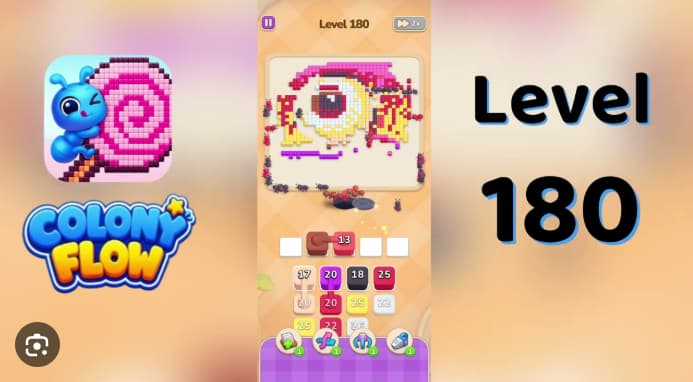














































































































































































Colony Flow Level 180 presents a giant one-eyed pixel character that requires precise color routing to complete.
This level asks you to open the pale-yellow perimeter first, then guide purple, red-pink, cream, dark, white, brown, and late yellow fragments through the eye and its key icons in sequence. The challenge lies in managing multiple color paths without creating blockages or misrouting fragments.
This walkthrough focuses on the specific mechanics and routing order that solve Level 180 efficiently.
Colony Flow Level 180 Walkthrough
Colony Flow Level 180 features a giant one-eye pixel character. The solution requires opening pale-yellow perimeter routes first, then routing purple, red-pink, cream, dark, white, brown, and yellow fragments through the eye and key icons in controlled waves.
The central crossing becomes a bottleneck if multiple large stacks enter simultaneously, so manage buffer pads throughout. After the pupil vanishes, lower-outline groups still remain—clear them before the Victory screen appears.
How to Play Colony Flow Level 180 - Step-by-Step Solution
-
Open the pale-yellow/yellow perimeter. Follow the 29 / 22 / 18 route and let those ants pass the lower hole before opening another large stack.
-
Add purple 18 / 20, then red-pink 12. The canopy and eye border separate while one white buffer pad remains free.
-
Work cream 13, brown 13, then yellow 15. Do not open all lower 20 cards together—their lanes converge beneath the eye.
-
Clear red-pink and purple 20 groups in separate waves. Keep the white iris visible while the magenta field contracts around it.
-
Send red and dark rows through 22, 20, 18, and 14. Wait for each train to clear the central hole before the next selection.
-
Take cream and white groups through the9 / 5 / 3 / 16-range cards as the pupil and iris fragments open. Reserve a slot for the late white 20.
-
Return to the yellow and brown side fragments. Clear brown/dark 7 / 15 and pink 13 as the picture becomes mostly white, yellow, and magenta.
-
Finish the small eye-side row in order: brown 1, pink 12, cream/white 3, yellow 19, dark 18, white 20, pink 3, red 3.
-
Clear the lower outline groups one at a time: lower white 20, pink 20 / 21, brown 20, yellow 25. These remove the remaining key and lower-outline pixels.
-
Wait for the final ants to finish crossing before the board shows Victory. Do not restart a lane during the empty-board transition.
Common Mistakes
- Opening several red-pink 20 and dark 18 / 20 cards before the yellow perimeter has cleared space at the central crossing.
- Filling every buffer during the eye reveal, leaving no slot for cream/white 9 / 5 / 3 and the late white 20.
- Stopping when the pupil vanishes and skipping the magenta canopy, key icons, brown lower outline, or small pink/red 3 cards.
Strategy Notes
The board shows layered pixel art: yellow and purple open the eye silhouette, red-pink and cream reveal the iris, and dark, white, brown, and yellow dismantle the pupil and outline. Five white buffer pads start above the grid and one brown hole sits below.
Keep at least one buffer pad open whenever the center is active. Red-pink 20 and dark 18 / 20 share the central crossing, so opening several while yellow still occupies the perimeter can strand later groups. The yellow perimeter creates room for the eye routes—opening it first is safer than beginning with lower 20-range stacks.
After the eye looks mostly empty, check for yellow 19, dark 18, white 20, pink 3, red 3, and the lower white, pink, brown, and yellow groups. These cards clear the key icons and lower outline before Victory appears.
Related Games
- Colony Flow Level 22 Walkthrough — Continue practicing the same color-route timing and limited-buffer management needed to prevent converging ant lanes from blocking one another.
- Colony Flow Level 20 Walkthrough — This nearby level offers another focused Colony Flow puzzle for players who want to apply the staged card-opening approach used in Level 180.
- Colony Flow Level 18 Walkthrough — Its walkthrough is a useful follow-up for learning how to clear exposed color groups in sequence while preserving buffer space.
Enjoy!