
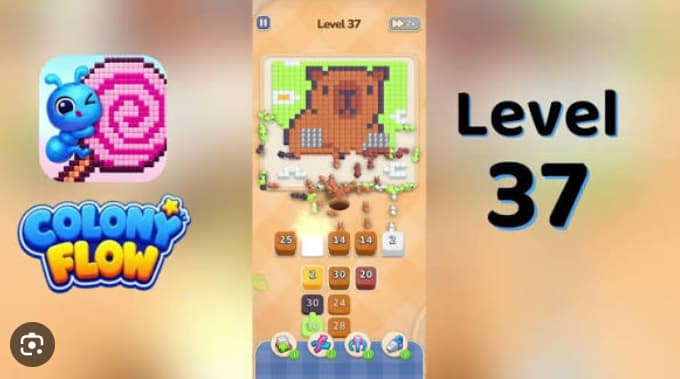














































































































































































Colony Flow Level 37 Walkthrough guides you through one of the game’s trickier puzzle stages, where managing pipe connections and resource flow becomes significantly more complex than earlier levels.
This level introduces tighter space constraints and requires precise sequencing to connect your colony’s production nodes without creating bottlenecks or dead-end passages. This walkthrough focuses on the core solve path—identifying which pipes to place first, where the critical junction points are, and how to route your flow lines efficiently to reach full completion.
You’ll find step-by-step placement guidance, common mistakes that block progress, and the specific order that makes the puzzle click into place without trial-and-error backtracking.
How to Solve Colony Flow! Level 37 — Full Walkthrough
Colony Flow! Level 37 presents a fox portrait on a green background. The large green field must clear first—otherwise the orange fox body, brown shading, maroon shadow band, and facial details get stranded behind green ants still occupying the dirt path. The active row functions as a staging area: the five white buffer slots in cells 2 through 6 hold refills that arrive in strict order, so filling them too early with source-row stacks breaks the sequence.
Start with the far-left green 18 stack. Tap it once, wait one beat for the first wave to clear the bottom edge of the background, then tap it again. Do not send other colors or fill the white buffer slots during this opening.
Once the green perimeter is mostly cleared, work through the refill waves in order:
First refill group:
brown 30 → dark green 1 → dark green 28 → dark 22.
Wait one beat between each. These colors share the dirt path, so overlapping waves causes jams.
Fox-body sequence:
orange 20 → light green 17 → brown 20 → dark 1.
Keep them staggered. Do not let brown 11, brown 15, brown 13, brown 16, or light blue 10 enter the active row during this phase.
Brown-shading refill chain:
- brown 11 → brown 15 → brown 13 → brown 16 → brown 2
- brown 8 → light green 24 → brown 11 → brown 17 → brown 16
Late detail waves:
dark 27 → dark 4 → dark 12 → light green 4 → dark 2 → brown 18 → dark 6 → yellow 2.
Final cleanup:
brown 3 → light blue 18 → yellow 2 → dark 25 → light green 31 → brown 19 → light blue 2 → light green 25 → dark 10 → brown 1.
The level ends when the last cube routes off and the completion banner appears.
Quick Tips for Colony Flow! Level 37
-
Preserve the five white buffer slots. They hold later refills—small face accents, outline pieces, and cleanup colors. Filling them early forces brown, orange, or dark stacks into the active row at the wrong time.
-
Let green establish the route first. The green background opens space for fox body colors. Sending orange or brown while green ants still occupy the route is the most common jam.
-
Use one-beat spacing on shared paths. Brown shading, orange body, dark outline, light green accents, and yellow details all use the same dirt path. Wait until the previous wave advances before dispatching the next.
-
Save detail colors for late cleanup. Yellow, light blue, dark, and light green finish isolated facial and outline cells. They work better once the large background, body, and shading areas are cleared.
Common Mistakes to Avoid
-
Filling the five buffer slots with orange 25, light orange 24, brown 15, dark red 30, dark green 28, dark yellow 30, yellow 2, light blue 28, or dark yellow 4 from the source row before the green 18 wave clears the perimeter. This strands brown and orange refills behind active green ants and leaves the fox body and shading half-empty.
-
Firing orange 25 from source row 2 while green ants are still walking the dirt path. This blocks the orange 20 and light orange 20 refills that need to reach the fox body.
-
Tapping brown 15 from source row 1 before the green background is at least half-cleared. This sends brown ants across green cells that still need clearing and stalls them on fox body shading.
Related Games
- Colony Flow Level 30 Walkthrough — Continue with this nearby advanced-level guide for another Colony Flow puzzle that demands careful refill timing and active-row management.
- Colony Flow Level 28 Walkthrough — This walkthrough provides a useful follow-up for players practicing the color-routing and buffer-slot discipline needed in Level 37.
What Colors Appear in Level 37?
Green, brown, dark-red (maroon), orange, light-orange, dark-green, light-green, yellow, dark-yellow, light-blue, black (dark), and white.
Green forms the background perimeter. Orange and light-orange build the fox body. Brown handles shading. Dark and dark-red cover the outline, ears, eyes, nose, legs, and maroon shadow band. Light-green fills ear tips and tail tips. Yellow and light-blue add small accent cells. White appears in the chin tuft and teeth.