














































































































































































Colony Flow Level 132 Walkthrough guides you through one of the trickier stages in this connection-based puzzle game, where you need to link colored colonies by drawing flow paths across the grid without crossing lines.
Level 132 introduces tighter spaces and more complex color patterns that demand careful planning before you commit to any moves. This walkthrough focuses on the most efficient solution path, which colors to connect first, and how to navigate the cramped grid layout without blocking yourself.
You’ll find the specific move sequence that clears the level, plus tips on recognizing similar patterns in future stages so you can apply the same logic when you hit comparable bottlenecks.
Colony Flow Level 132 Walkthrough
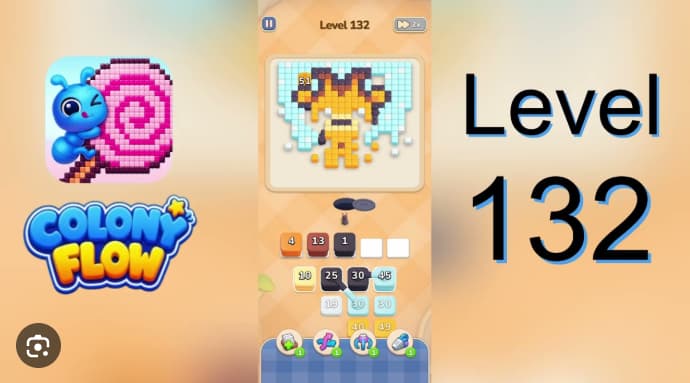
Colony Flow Level 132 is a snowy tiger-cub board where the body, stripes, ground, and background wall must open together. The board funnels most traffic through a single ant hole, so early cleanup on scattered pieces blocks the main routes.
The reliable approach is to drain the broad silhouette first—orange body, dark contours, cyan snow wall—before touching the pink cheek bands or white snow dots.
How to Solve Colony Flow Level 132
Start with the loaded mixed opener: send orange 13, dark 32, green 1, white 2, and cyan 30. These open the cub body, dark contour, lower ground edge, muzzle, and snowy background together without clogging a single lane.
Shrink the broad silhouette in parallel: follow with orange 37/49 and cyan 40/45. Keep the orange body and cyan wall draining together; leaving either large strands later tail and stripe traffic.
Maintain the dark contours: use dark 30/39 while the orange lanes remain open. These clear the ear tips, tail line, and side stripes before they become trapped behind the body.
Clear the heavier center waves: send yellow 40/49, then continue through the remaining orange body stacks. This opens the forehead, torso, and tail area for the smaller routes.
Release pink 6 late: wait until the orange center and white muzzle have room before sending the pink cheek band. Pink traffic is narrow but parks in the center if played too early.
Finish with cleanup traffic: clear the remaining white snow dots, cyan wall strips, and small dark stripe segments last.
Tips for Colony Flow Level 132
- Treat the opener as one connected move. Orange 13, dark 32, green 1, white 2, and cyan 30 work best when their structural lanes begin together.
- Prioritize orange and cyan. The body and snowy background are the widest routes. Keeping them draining prevents congestion around the cub’s tail and side contours.
- Keep dark stripes active before detail cleanup. Dark 30 and 39 need space around the body and should be handled before the board becomes crowded.
Common Mistakes to Avoid
- Sending pink 6 early. The cheek band looks small, but it blocks the central route until the muzzle and orange body have opened.
- Flooding white snow dots at the start. Scattered white pieces compete with cyan wall and dark stripe traffic at the shared ant hole.
- Using accents as openers. Small dark singles, cheek bands, and snow-dot cleanup are safest only after the tiger-cub silhouette is established.
Related Games
- Colony Flow Level 32 Walkthrough — This is a useful follow-up for players who want more practice managing dark stripe traffic alongside larger color families without clogging the ant lane.
- Colony Flow Level 30 Walkthrough — Its walkthrough complements Level 132’s need to keep broad background routes moving while delaying small cleanup pieces.
- Colony Flow Level 39 Walkthrough — Players struggling with Level 132’s late dark contour and stripe segments can use this guide for another Colony Flow routing challenge.
Enjoy!