














































































































































































Colony Flow Level 55 Walkthrough guides you through one of the trickier stages in this colony-building puzzle game, where efficient resource flow and spatial planning become critical.
This level introduces tighter constraints and more complex pipe networks than earlier stages, requiring you to balance multiple colony needs simultaneously while managing limited space. This walkthrough focuses on the core mechanics that solve Level 55: optimal pipe placement to maximize flow efficiency, resource prioritization strategies when space is tight, and the specific colony layout that clears the level requirements.
You’ll find direct answers for the most common bottlenecks players hit, including where to place your initial connections and how to avoid the dead-end configurations that force restarts.
What Is Colony Flow Level 55 Walkthrough?
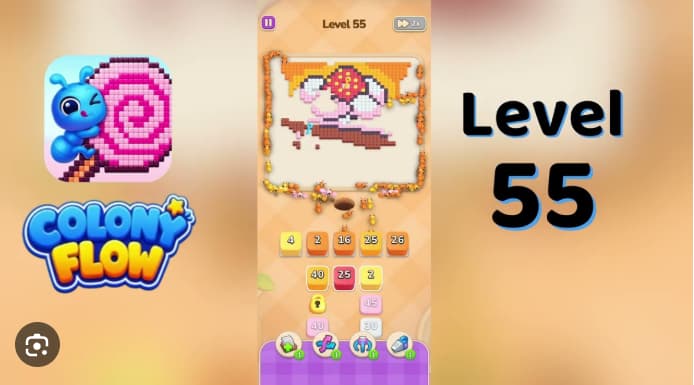
Colony Flow Level 55 is a strawberry-cake board where all color waves funel through one ant hole and shared dirt path. The yellow5 and black 7 stacks must clear the top of the cake before the pink 29 frosting wave starts. The walkthrough below gives the correct tap order and spacing to prevent route congestion. This refers to the color-routing puzzle game Colony Flow!, not the American science-fiction drama Colony.
The level uses a 5-cell active row (pink 29, yellow 5, white 27, brown 30, black 7) plus a 4-row source grid. Yellow clears pixel rays behind the strawberry, black traces the cake outline, pink drains frosting layers and icing drips, white clears whipped cream, brown handles the cake base and wooden plate, and late-arriving redants clear the strawberry itself.
Step-by-Step Colony Flow Level 55 Walkthrough
Clear the active row in this order:
- Yellow 5 (cell 2) – Clears the yellow rays behind the strawberry. Wait one beat before the next tap.
- Black 7 (cell 5) – Traces the black outline around the cake silhouette. Yellow and black share the dirt path, so leave one beat between them.
- Pink 29 (cell 1) – Clears the pink frosting layers and right-side icing drips. Do not tap pink before yellow and black have started clearing the top.
- White 27 (cell 3) – Drains the white whipped-cream cells on top of the cake base.
- Brown 30 (cell 4) – Clears the brown cake base and wooden plate. Do not tap brown before white has started clearing the cream.
After the active row is empty, drain the source grid in row order:
- Source row 1: blue 30 → yellow 33 → brown 30 → yellow 44
- Source row 2: orange 40 → white 2 → blue 30
- Source row 3: orange 40 → pink 35 → blue 30
- Source row 4: pink 30 → blue 30 → pink 30 → orange 30
Leave one beat between each source wave. Do not send orange 40 from source row 2 while pink ants are still walking to the frosting layers.
Finish with the late red strawberry refills and remaining small pink, white, yellow, and blue cleanup stacks.
Common Mistakes
- Tapping pink 29 before yellow 5 and black 7 have started sends pink ants across the top of the cake that yellow and black still need to clear, stalling the frosting wave.
- Tapping brown 30 before white 27 has started clearing the cream strands brown ants on the remaining base cells while white ants queue behind them on the same dirt path.
- Letting orange 40 rise into the active row while pink ants are still walking the path strands orange ants on the remaining plate-rim cells and blocks the late orange 30 cleanup wave from source row 4.
Tips for Completing Colony Flow Level 55
- Clear yellow 5 and black 7 first. The yellow rays and black outline are the two smallest regions and must finish before the large pink 29 frosting wave is allowed onto the dirt path.
- Drain white 27 before brown 30. The whipped cream sits above the cake base. Sending brown first strands brown ants while white ants queue behind them.
- Work the source grid in row order after the active row is drained. Tap blue 30 and yellow 33 in source row 1 only after the yellow 5 wave has cleared, orange 40 stacks in rows 2 and 3 only after pink 29 has cleared, and pink 30 stacks in row 4 only after white 27 has cleared.
- Use the one-beat rule. Most Level 55 failures come from two waves entering the shared dirt path too closely together.
Related Games
- Colony Flow Level 35 Walkthrough — This same-game guide is a useful follow-up for players who want another color-wave puzzle requiring careful stack-tap timing.
- Colony Flow Level 30 Walkthrough — Players practicing the active-row and source-row sequencing used in Level 55 can apply those Colony Flow routing skills to this earlier walkthrough.
- Colony Flow Level 29 Walkthrough — This nearby-level guide gives readers another focused Colony Flow solution to consult when learning how to avoid blocking shared ant paths.
Enjoy!