
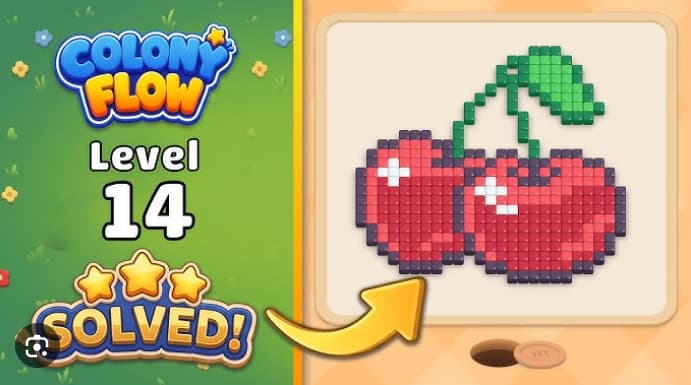














































































































































































Colony Flow Level 14 is a card-stacking puzzle where you clear all cards by building sequences in ascending or descending order, using three buffer slots at the top to unlock blocked cards as columns drain.
The core challenge comes from managing these buffer spaces strategically—moving cards up temporarily so lower stacks can rise into playable positions, then cycling them back down when sequences align. This walkthrough focuses on the mechanics that matter most: how buffer slots create solve paths, which card movements open up the most options, and how to recognize when you’re one move away from a full clear versus heading into a dead end.
You’ll find the clearest play-focused answers and practical details for working through the level’s specific card layout without guessing.
Colony Flow Level 14 Walkthrough
Colony Flow Level 14 is a four-row stack board where Red25/25/25/30, Black 15/20/20/25, Green 20/20, and White 5 all share one dirt path to the ant hole. The goal is to fill a three-cherry pixel-art target: red for the cherry bodies, black for the outline and stem, green for the two leaves, and white for the small highlight crosses. Because every color uses the same route, the solve depends on alternating red and black waves while leaving space for green and white at the right moments.
Board Layout and Objectives
The stack grid sits below a shared dirt path and ant hole. The cherry cluster—two cherries side by side with a third stacked above—starts empty except for its outline grid.
- Left column: Four red stacks fill the cherry bodies. The opening stack is Red 25 in the top-left, followed by Red 25, Red 25, and Red 30 in the lower rows.
- Middle column: Four black stacks create the cherry outlines and shared stem—Black 15, Black 20, Black 20, and Black 25.
- Right column: Two Green 20 stacks fill the leaves above the stem. The bottom-right White 5 supplies the small highlight crosses on the cherries.
- Buffer slots: Three empty top-row spaces allow lower stacks to rise into playable positions as the columns drain.
A visible stack is not always ready to use if the shared route is crowded. Tapping Red three or four times before ever firing Black will clear the cherry bodies faster than the outline, stranding dark outline cells behind red ants on the perimeter.
How to Play Colony Flow Level 14
- Tap the top-left Red 25 once. Let the first wave begin clearing the route, then tap the same Red 25 again to send a second wave toward the cherries.
- Tap the top-middle Black 15 once the second red wave is moving. Leave a beat between the red and black taps so both colors can enter the shared perimeter without blocking each other.
- Tap the second-row Red 25 in the left column as soon as it rises to the top of the grid. Once that red stack has partly drained, tap the second-row Black 20 in the middle column.
- Continue with the visible red stacks in order: tap the third-row Red 25, then the Red 30. Between red waves, feed the newly available black stacks—third-row Black 20 and bottom Black 25. Red and black should be clearing the cherries in parallel so the outline does not lag behind the body.
- Tap the first Green 20 in the second row of the right column as soon as the column-3 buffer slot is clear. The green ants walk the same dirt path and start clearing the two small green leaves above the cherry stem. A second Green 20 rises from the third row and is tapped next to finish the leaves.
- Tap the lone White 5 in the bottom-right of the grid as the second-to-last move. The five white ants walk the dirt path and clear the small white highlight cross on the front of each cherry. The level does not finish cleanly if the White 5 is fired before the red bodies are at least half-cleared.
- Finish by tapping whatever small Red 1, Green 3, or White 1 stacks are still visible in the lower rows to clear the last cherry cells. The board clears once the last cube is delivered into its matching cell.
Common Mistakes
- Tapping Red 25 three or four times in a row before ever firing Black 15. This clears the cherry bodies faster than the outline and strands the dark outline cells behind red ants on the perimeter.
- Firing Green 20 before the column-3 buffer slot has a clear route. Green ants use the same dirt path as red ants, and a premature green click stalls the leaves on remaining body cells.
- Tapping the lone White 5 before the red bodies are at least half-cleared. This scatters the white ants on the perimeter and leaves the small highlight cross on the front of each cherry empty.
Quick Tips
- Tap the leftmost Red 25 first, then the Black 15 right after it. Red and black have to be clearing the cherries in parallel or the dark outline cells get stranded behind the red ants.
- Save the lone White 5 in the bottom-right of the grid for the very end. It is the only highlight color and the small white cross on the front of each cherry only lights up once the red bodies are mostly cleared.
- Let the new green stack that rises into the column-3 buffer slot land before you fire any more black. Green ants share the dirt path with red ants, and a premature green click stalls the leaves on remaining body cells.
Related Games
- Colony Flow Level 15 Walkthrough — Continue directly to Level 15 for the next Colony Flow puzzle after mastering Level 14’s shared-path timing between color stacks.
- Colony Flow Level 16 Walkthrough — Level 16 is a useful follow-up for players who want more practice sequencing ant waves and managing newly revealed stack positions.
Enjoy!