
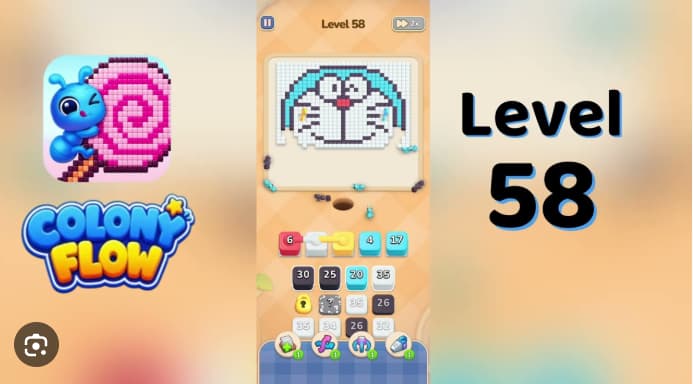














































































































































































Colony Flow Level 58 is a Doraemon-face portrait board where all five color zones—cyan head, white muzzle, black eyes, yellow whiskers, and red nose—share a single ant hole.
This walkthrough breaks down the exact firing sequence, explains why the yellow opener must go first, and shows how to manage the shared ant hole without blocking your own flow.
Colony Flow Level 58 Walkthrough
Colony Flow Level 58 is a Doraemon-face board where cyan head, white muzzle, black eyes, yellow whiskers, and red nose all share one ant hole.
The challenge is timing: the yellow 7 whisker opener in cell 3 must fire before the cyan 20 head wave in cell 1, even though cyan sits first in the active row. Sending colors too close together causes waves to queue and block each other on the shared dirt path.
Step-by-Step Solution
Clear the five starting stacks in this order, leaving one beat between taps so the previous wave moves through the dirt path:
-
Yellow 7 in cell 3. Yellowants walk up to the thin whisker lines on both cheeks and start clearing in the first beat. Do not tap cyan yet.
-
Cyan 20 in cell 1. Cyan clears the wide head and ear outline. If sent before yellow, cyants cross the whisker cells and stall on the remaining head outline behind active yellow ants.
-
White 28 in cell 4. White clears the large muzzle. Wait one beat after cyan.
-
Black 27 in cell 2. Black clears the eye pupils and face outline. The muzzle should be at least half-cleared before black starts, or blackants strand on remaining pupil cells while white ants queue behind them.
-
Red 18 in cell 5. Red clears the nose circle. Wait one beat after black.
When the active row empties, tap source row 1 left to right as each stack rises:
- Yellow 35 (cell 1)
- Black 25 (cell 2)
- White 35 (cell 3)
- Cyan 35 (cell 4)
Leave one beat between each. These waves clear remaining whisker, outline, muzzle, and head cells.
Next, clear source row 2 as it rises:
- Gray 25 (cell 1) — clears shadow cells at the base
- Cyan 35 (cell 2)
- White 35 (cell 3)
- Cyan 26 (cell 4)
Hold the gray 25 until cyan 35 head refills have at least started clearing the ear outline.
Finish with late cyan, white, black, yellow, and red cleanup refills as they rise into whichever active-row cell opens first.
Common Mistakes
Firing cyan 20 before yellow 7 sends cyan ants across whisker cells that yellow still has to clear, stalling cyan on the remaining head outline.
Tapping black 27 before white 28 starts the muzzle strands black ants on pupil cells while white ants queue behind them on the same path.
Letting yellow 35 from source row 1 rise while cyan ants still walk the dirt path strands the large yellow wave behind active cyan ants and blocks late yellow whisker refills.
Quick Tips
-
Tap yellow 7 in cell 3 before cyan 20 in cell 1. The whisker lines are the smallest region and sit in cells cyan crosses on its way to the head outline.
-
Drain white 28 in cell 4 before black 27 in cell 2. The white muzzle sits between whiskers and black pupils; firing black first strands it behind active white ants.
-
Walk source row 1 left to right after all five active-row stacks drain. Hold gray 25 in source row 2 until cyan 35 head refills start clearing the ear outline.
Related Games
- Colony Flow Level 28 Walkthrough — Use this guide for another Colony Flow board solution that reinforces the careful stack-tapping and wave-timing skills required in Level 58.
- Colony Flow Level 27 Walkthrough — This is a useful follow-up for players who want another step-by-step Colony Flow routing puzzle after mastering Level 58’s active-row order.
Why Tap Yellow Before Cyan?
The yellow 7 stack is the smallest numbered stack on the board, and the yellow whisker lines are the smallest color region. Tapping cyan 20 first sends cyan ants across the whisker cells that yellow still has to clear, stalling cyan on the remaining head outline while yellow ants queue behind them on the same dirt path.