
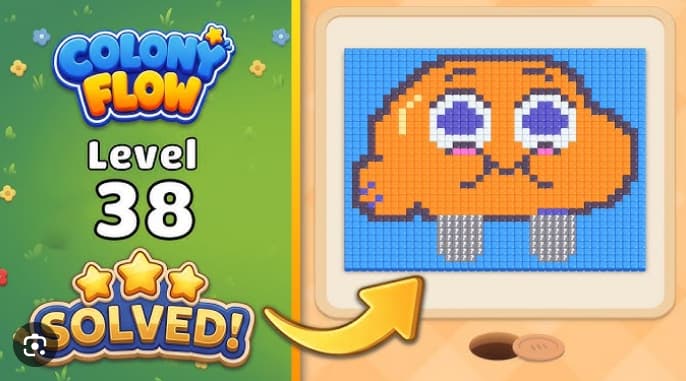














































































































































































Colony Flow Level 38 Walkthrough guides you through one of the game’s trickiest puzzle stages, where you must connect matching colored dots by drawing continuous paths across the entire grid without overlapping.
This level introduces tighter constraints and more complex starting positions than earlier stages, making it easy to box yourself into dead ends if you don’t plan your flow paths carefully. This walkthrough focuses on the specific solve sequence that works for Level 38, showing you which colony connections to establish first and how to route your flows to fill every cell.
You’ll find the exact step-by-step path order, critical decision points where most players get stuck, and the full solution that clears the board without leaving gaps.
Colony Flow Level 38 Walkthrough
Colony Flow Level 38 is a 4x4 octopus board where you clear a pixel-art octopus in color order: blue background first, then the orange body, followed by black outline, white highlights, yellow accents, and purple eyes. The critical detail is keeping the top-left white 20 buffer slot empty until the second half—filling it too early strands the white refill and blocks completion.
Step 1: Tap blue 25 in row 1, cell 2.
Wait one beat for blue ants to clear the bottom edge of the blue background. The stack drops to 3.
Step 2: Drain orange 34, then orange 14 in row 1.
Tap cell 3, wait for the perimeter to clear, then tap cell 4. This empties both stacks and makes room for lower orange refills to rise.
Step 3: Clear the orange body from rows 2 through 4.
Start with row 2’s four orange stacks (30/30/30/32), working left to right. Then tap row 3’s orange 30 and 36 on the right side, followed by row 4’s four orange 30 stacks. Leave one beat between taps to avoid jamming the dirt path.
Step 4: Tap black 32 in row 3, cell 1 once the orange body is half-cleared.
Black traces the octopus outline but blocks the orange route if used too early.
Step 5: Tap the white 20 buffer in the top-left after orange and black are mostly cleared.
The white refill needs this slot to clear the three head highlights. Do not fill it earlier.
Step 6: Finish with yellow 6, then purple 5.
Tap yellow 6 in row 3 to clear accent pixels. Wait for the purple 5 refill to rise, then tap it to clear both eye cells and complete the level.
Quick Tips
- Protect the white 20 buffer. The top-left slot must stay empty until step 5. Filling it early strands the white refill.
- Space out orange taps. Give each wave one beat to clear before starting the next stack.
- Hold black, yellow, and purple for the second half. These colors need the orange body mostly cleared first.
- Watch the purple eyes. The level ends only after both purple eye cells clear.
Common Mistakes
- Filling the white buffer early with orange or yellow blocks the white refill and leaves the head highlights empty.
- Tapping black 32 while blue ants are still walking strands black ants on the outline and blocks the orange route.
- Using yellow 6 before the orange body is half-cleared sends yellow ants across remaining orange cells, stalling progress.
Related Games
- Colony Flow Level 34 Walkthrough — Continue with this nearby late-game puzzle guide for similarly demanding color-routing timing and limited-buffer decisions.
- Colony Flow Level 32 Walkthrough — This walkthrough is a useful follow-up for players practicing the staged stack-tapping and delayed accent-color clears used in Level 38.
- Colony Flow Level 30 Walkthrough — Players working through the higher Colony Flow levels can use this guide to build confidence with multi-wave board-clearing sequences before Level 38.
Board Layout
The board shows a pixel-art octopus on a blue background: rounded orange body, two purple eyes, four short tentacles, three white head highlights, thin black outline, and small yellow accents. Below the dirt path is a 4x4 stack grid:
- Row 1: white 20, blue 25, orange 34, orange 14
- Row 2: orange 30, orange 30, orange 32
- Row 3: black 32, yellow 6, orange 30, orange 36
- Row 4: orange 30, orange 30, orange 30
High stack counts and limited staging space require controlled draining. The single dirt path connects all ant holes to the pixel art, so timing matters more than speed.