
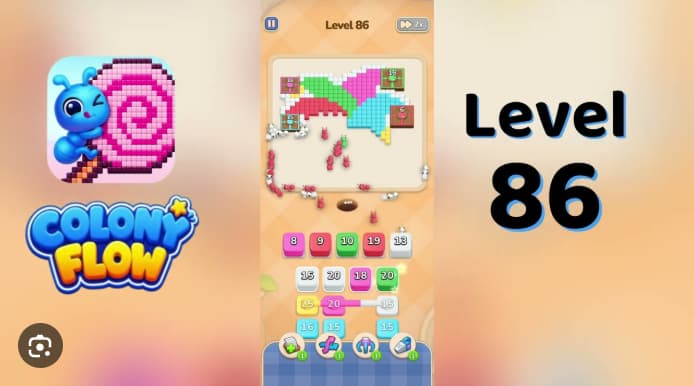














































































































































































Colony Flow Level 86 Walkthrough guides you through one of the game’s trickier puzzle stages, where managing resource flow and colony expansion requires careful timing and placement.
This level introduces mechanics that force you to rethink standard strategies—bottlenecks appear faster, and a single misplaced connection can stall your entire colony’s progress. This walkthrough focuses on the core moves that unlock the solution: which paths to establish first, where to position your initial nodes, and how to avoid the common trap that catches most players on their first attempt.
You’ll get the specific setup sequence and the key mechanic interaction that makes Level 86 click.
Colony Flow Level 86 Walkthrough
Colony Flow Level 86 is a butterfly-shaped board where yellow body, pink wing, green wing, and red band all share one dirt path. The yellow 1 opener must clear before touching the dark gray mystery stack in source row 2. The level uses a four-cell active row plus a two-row, four-column source grid, with all ant waves traveling through the same route from the bottom ant hole upward.
The critical rule: open with yellow, follow with pink, hold all source stacks until the path drains, and save the mystery stack for last.
How to Play Colony Flow Level 86 - Step-by-Step Solution
-
Tap yellow 1 in active-row cell 1. Yellow ants walk up to the yellow lower body and begin clearing the cells closest to the ant hole. Wait for the first ant to clear the bottom edge before tapping anything else.
-
Tap pink 8 in active-row cell 2. Pink ants walk the same dirt path and start clearing the pink right wing. Leave one beat between yellow and pink so the lower body is mostly cleared before the wing starts.
-
Wait for both yellow and pink waves to clear the dirt path between the ant hole and the bottom edge of the butterfly. Do not tap any source stack yet.
-
Clear source row 1 in this order as each stack rises into the active row:
- Green 18 (column 4) — clears the green left wing
- Cyan 15 (column 2) — clears the cyan body band
- Red 20 (column 1) — starts clearing the red body band
- Red 20 (column 3) — continues the red band
Leave one beat between each wave so the pink wing is mostly cleared before red starts.
-
Clear source row 2 in this order as each stack rises:
- Red 20 (column 1) — clears more of the red body band
- Yellow 22 (column 3) — clears remaining yellow lower-body cells and yellow bee accents
- Red 21 (column 4) — finishes the red band
Leave one beat between each wave.
-
Tap the dark gray mystery stack in source row 2, column 2 last. Gray ants clear the dark accent cells inside the body, and late refill waves finish the white pixel outline and remaining green and cyan wing cells.
Colors in this level: Yellow, Pink, Green, Red, Cyan, White, Gray
Common Mistakes to Avoid
-
Firing the mystery stack too early. If gray is sent before yellow 1 and pink 8 have cleared the dirt path, gray ants strand on accent cells and block the three red 20 stacks needed for the red body band.
-
Tapping red 20 stacks while pink ants are still walking. Red shares the same path as pink. Sending red before the pink wing starts clearing strands red ants on body-band cells and blocks the red 21 in source row 2.
-
Letting cyan 15 rise before green 18 has started. Green must begin clearing the left wing first. If cyan reaches the active row too soon, cyan ants strand on body-band cells.
Quick Tips
-
Treat the active row as the opener queue. Tap yellow 1 and pink 8 in that order before touching any source stack. The yellow lower body and pink right wing are the two smallest color regions and must clear together before red, cyan, or green can use the path.
-
Walk source row 1 before source row 2. Tap green 18 first among source stacks, then cyan 15, then both red 20s in row 1, then walk row 2 from red 20 through yellow 22 and red 21. Only then tap the mystery stack.
-
Save stack for late game. The dark gray mystery stack is the only wave that can clear the dark accent cells inside the body. Firing it early blocks the three red 20 stacks that need to clear the red body band.
Related Games
- Colony Flow Level 28 Walkthrough — Continue with this nearby Colony Flow puzzle guide for another color-stack routing challenge that rewards careful tap order and path timing.
- Colony Flow Level 26 Walkthrough — This walkthrough is a useful follow-up for players practicing the same active-row and source-stack sequencing used to prevent blocked ant waves in Level 86.
Enjoy!