














































































































































































Colony Flow Level 69 Walkthrough guides you through one of the trickiest puzzle stages in Colony Flow, where managing resource paths and colony expansion requires precise timing and spatial planning.
This level introduces complex flow mechanics that challenge even experienced players, with multiple resource streams that must intersect without blocking critical pathways. This walkthrough focuses on the core strategy: identifying the optimal starting position for your primary colony, mapping out flow directions before committing resources, and using the level’s corner spaces to create efficient loops.
You’ll find step-by-step moves for the critical opening sequence, solutions for the mid-game bottleneck where most players get stuck, and a clear path to three-star completion without wasting moves on trial-and-error.
Colony Flow Level 69 Walkthrough
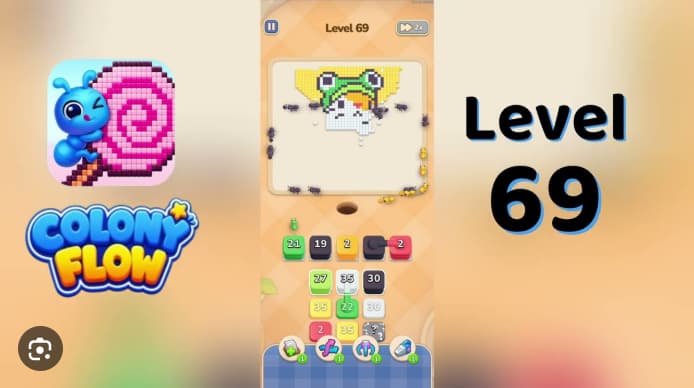
Colony Flow Level 69 is a frog-hat cat board where red, black, yellow, and white all share one dirt path. The small red 2 opener must clear the rainbow stripe before the black 27 pupil wave is sent, or the shared route clogs and blocks late refills. Success depends on clearing the five active-row stacks in exact order—red 2, black 9, yellow 22, yellow 24, black 27—before touching the source grid, then walking source rows 1 and 2 left to right with one-beat spacing so yellow background traffic drains before white body waves flood the path.
Step-by-Step Solution
Tap red 2 in the fourth cell of the active row.
Red ants walk up to the rainbow stripe across the cat’s head. Wait for them to clear the dirt path before tapping the next stack.
Tap black 9 in the third cell.
Black ants start clearing the black eye cells on the cat’s face. Leave one beat between red and black so the stripe is mostly cleared before the eyes begin.
Tap yellow 22 in the first cell, then yellow 24 in the second cell.
Yellow ants clear the grid background along the bottom edge. Wait one beat after black so the eyes are at least half-cleared before the background starts.
Tap black 27 in the fifth cell.
Black ants clear the pupils inside the frog-hat eyes. Wait until the yellow background is mostly cleared. Sending this wave early strands black ants on the pupil cells and blocks the late black refills that finish the eyes.
Clear source row 1 left to right:
Yellow 30, white 30, yellow 26, white 30, yellow 30.
Yellow clears the last background cells; white floods the head and body. Leave one beat between each stack so the yellow background is at least half-cleared before white starts.
Clear source row 2 left to right:
Blue 35, yellow 25, yellow 22, gray 22, white 30.
Blue clears the side blocks, yellow clears the paw accents, gray clears the frame, and white finishes the body. Hold blue 35 until the white body is mostly cleared. Tapping it while yellow ants are still on the dirt path traps blue ants on the side-block cells and blocks the late blue refills.
Tap the late green refills as they rise into the empty white buffer pad in the active row.
Green ants clear the frog hat on top of the cat’s head. Leave one beat between each green wave so the white head is mostly cleared first.
Tap the late pink, rainbow, white, and black cleanup refills as they rise.
Pink clears the nose, rainbow clears the horizontal stripe, and the last white and black waves finish the frog-hat eyes and body. The board clears once the final cube routes off.
Common Mistakes
-
Firing black 27 too early. If the red 2, black 9, and yellow 22 waves have not cleared the bottom edge, black ants cross the white head and stall on the remaining pupil cells, blocking the late black refills that need to finish the frog-hat eyes.
-
Tapping blue 35 while yellow is still on the path. This strands blue ants on the side-block cells and blocks the late blue refills that clear the rest of the blue accents.
-
Letting white 30 from source row 1 rise before yellow is half-cleared. This strands white ants on the head cells and blocks the white 30 in source row 2 that clears the rest of the body and the frog-hat eye cells.
Tips to Clear the Level
-
Drain the active row first. Tap red 2, black 9, yellow 22, yellow 24, and black 27 in that order before touching source row 1. The red rainbow stripe and yellow background are the highest-traffic regions and must clear together before the white body, green frog hat, or blue side blocks enter the dirt path.
-
Treat the active row as the opener queue. The row has no empty buffer slots at the start, so clear the small openers first, then the yellow background flood, then the pupil pair, and only then walk the source grid.
-
Save black 27 and blue 35 for mid-game. The black pupils and blue side blocks are small color regions. A premature tap strands those ants on the accent cells and blocks the late refills that need to rise into the empty white buffer pad.
-
Watch the waiting slots. Do not rapidly tap several stacks in succession. Late green, pink, rainbow, white, and black refills need the surfaced white buffer space to finish cleanly.
Related Games
- Colony Flow Level 27 Walkthrough — Continue with another later-stage Colony Flow puzzle requiring careful stack-release timing and route management.
- Colony Flow Level 26 Walkthrough — Its nearby level placement makes it a useful follow-up for players practicing the color-wave sequencing used in Level 69.
- Colony Flow Level 24 Walkthrough — This walkthrough offers another focused solution guide for players who want to refine active-row and source-stack tapping order.
Enjoy!