
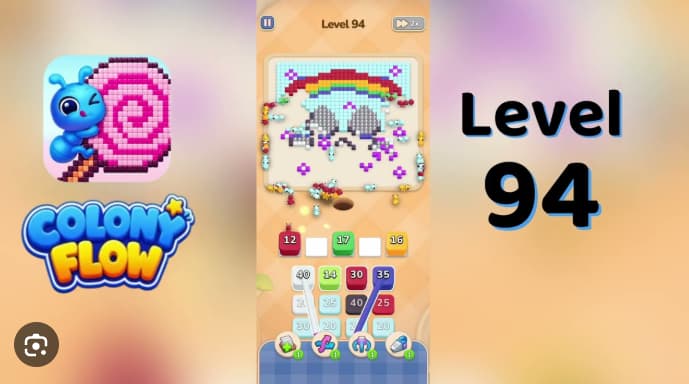














































































































































































Colony Flow Level 94 is a puzzle stage that challenges you to connect all nodes by directing the flow path without overlaps or dead ends.
The key to beating Level 94 lies in starting from the correct anchor points and working outward systematically.
Colony Flow Level 94 Walkthrough
Colony Flow Level 94 is a rainbow-and-skull board with a single shared dirt path. The cyan crystals, green rainbow band, red arch, and gray eyes all use the same route, so timing matters. The cyan opener waves must clear before the red 25 stack in source row 1 enters the path, or the red band will stall and block later cleanup waves.
Start with the four stacks in the 5-cell active row—cyan 8, cyan 16, cyan 25, and green 14—in that order. Do not tap any source-row stack until these opener waves are moving. Keep active-row cell 5, the white buffer pad, empty for late refills.
How to Play Colony Flow Level 94 - Step-by-Step Solution
-
Tap cyan 8 in active-row cell 3. Wait until the bottom-frame cyan crystals begin clearing.
-
Tap cyan 16 in cell 2, then cyan 25 in cell 1. Leave one beat between each wave so the cyan stacks clear the left-frame crystals and cyan background around the skull.
-
Once the cyan background is mostly clear, tap green 14 in cell 4. Do not tap any source-row stack before this point.
-
Drain source row 1 in order as each stack rises into the active row:
- red 25
- red 35
- red 30
- red 47
Leave one beat between red waves to prevent the rainbow path from stalling.
-
Clear source row 2 in order:
- green 27
- green 25
- green 34
- red 30
-
Tap white 35 from source row 3 last. This clears the skull-eye highlights and opens the remaining gray, purple, yellow, orange, and blue refill stacks.
Common Mistakes to Avoid
Firing red 25 too early. The red 25 stack in source row 1 shares the path with cyan and green. If you tap it before the cyan and green opener waves have cleared the frame perimeter, red ants will stall on occupied red-band cells and block red 35, red 30, and red 47 waiting behind them.
Tapping white 35 while gray ants are still walking. This strands white ants on the remaining white highlight cells inside the eyes and blocks the late gray and purple refill waves that need to rise into the empty buffer pad.
Letting green 27 rise before the cyan background is half-clear. This strands green ants on the remaining green rainbow cells and blocks green 25 and green 34.
Quick Tips
-
The active row is your opener queue. Drain cyan 8, cyan 16, cyan 25, and green 14 before touching any source-row stack.
-
The fifth-cell white buffer pad must stay empty until the end. The late gray, purple, yellow, orange, and blue refills need this open space as they rise into the active row. Filling it with a source-row click strands the refill waves.
-
Leave one beat between waves that share the path. The cyan crystals, cyan background, green rainbow band, and red arch all use the same dirt route, so stagger your taps to prevent traffic jams.
Related Games
- Colony Flow Level 25 Walkthrough — This earlier Colony Flow puzzle offers another color-stack routing challenge for players who want to practice timing waves through shared paths.
- Colony Flow Level 29 Walkthrough — Its walkthrough is a useful next stop for players looking for more advanced active-row and refill-queue management after Level 94.
Enjoy!