
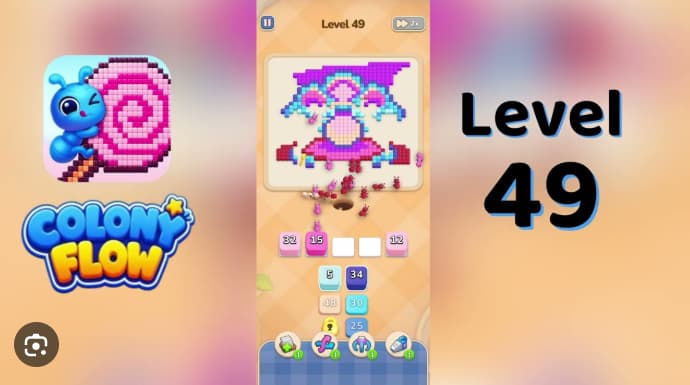














































































































































































Colony Flow Level 49 presents a deceptively simple shell-and-pearl pixel-art board with a large background-colored area, but the real puzzle lies in the tray beneath it.
This walkthrough breaks down the exact solve path, showing you how to connect every flow without blocking yourself into dead ends. The key challenge is managing the limited space in the lower tray while keeping the main board clear for your final connections.
You’ll get the clearest play-focused answers and practical details to solve Level 49 efficiently.
Colony Flow Level 49 Walkthrough
Colony Flow Level 49 is a pink-and-teal character board where purple, pink, cyan, and blue stacks all queue through one shared dirt path. The purple antenna and pink ears must clear before body colors can move in. The active row holds four opening stacks—purple 12, pink 17, pink 19, and purple 22—plus one empty white buffer pad.
Below that, a three-by-three source grid supplies nine more stacks that rise into the active row as slots open. The challenge is managing the shared route and keeping the five waiting slots from filling, which ends the run.
Tap the four active-row stacks first, leaving roughly one beat between each dispatch so the previous wave mostly clears the dirt path before the next arrives. Once those four waves have left the trail, release the source-row stacks in order: pink 45, pink 36, and blue 40 from source row 1; cyan 22, pink 12, and blue 34 from source row 2; then cyan 13, cyan 45, and blue 34 from source row 3. Late cleanup refills rise through the buffer pad to finish the red base and remaining highlights.
How to Solve Colony Flow Level 49 — Full Solution
-
Tap purple 12 in active-row cell 1. Let the ants clear the dark antenna at the top of the portrait. Wait until the antenna’s lower edge is mostly empty before tapping again.
-
Tap pink 17 in cell 2. After one beat, when the left pink ear and cheek are at least half-cleared, tap pink 19 in cell 3. These stacks share a route, so do not dispatch them back-to-back.
-
Once the right pink ear is mostly cleared, tap purple 22 in cell 4. This clears the dark accent cells inside the cyan body. Do not use the white buffer pad or release any source-row stacks during this opener sequence.
-
When the active-row trail has emptied, release source row 1 in this order:
- pink 45
- pink 36
- blue 40
Leave one beat between each stack. The pink highlight regions need to clear before blue ants enter the body-highlight route.
-
Release source row 2 in this order:
- cyan 22
- pink 12
- blue 34
Keep the cyan body wave from crowding the path until blue highlights are at least partly cleared.
-
Finish with source row 3:
- cyan 13
- cyan 45
- blue 34
Late cleanup refills rise through the buffer pad and clear the remaining red base, pink highlights, and blue body cells.
Common Mistakes to Avoid
Firing blue 40 before the active-row waves clear. If the purple antenna and pink ears still holdants when blue 40 launches, blue ants cross the pink regions and stall on the remaining blue body highlights, blocking the two blue 34 stacks in source rows 2 and 3.
Tapping purple 22 while pink ants walk the dirt path to the left ear. Purple ants strand on the dark accent cells and block late purple refills that need to clear the rest of the accents inside the body.
Letting cyan 22 rise before the pink ears are mostly cleared. Cyan ants strand on the teal body cells and block cyan 13 and cyan 45 in source row 3, which need to clear the rest of the body.
Quick Tips for Colony Flow Level 49
-
Treat the active row as the opener queue. Tap purple 12, pink 17, pink 19, and purple 22 in that order before touching any source-row stack. The dark antenna and pink ears are the highest-traffic regions and must clear together before blue 40 or cyan 22 enters the dirt path.
-
Use the buffer pad only for cleanup refills. The empty white pad in cell 5 is space for late red, pink, and blue refills that finish the base and highlights. Filling it early with a source stack strands those waves and leaves the board incomplete.
-
Pause between colors. Leave roughly one beat after each dispatch so the previous wave mostly exits the shared route before the next arrives. Watch the bottom edge of the portrait—send the next stack only after the previous ants have moved off that section.
-
Protect the five waiting slots. A full tray ends the run. Avoid tapping a stack merely because it is available. Release source-row stacks only after the previous wave has cleared the trail.
Related Games
- Colony Flow Level 24 Walkthrough — Continue with another Colony Flow puzzle guide for similarly precise stack-tapping order and shared-path timing.
- Colony Flow Level 22 Walkthrough — This nearby level walkthrough offers another practical route-planning challenge for players learning to manage color waves and refill queues.
What Makes Level 49 Different?
The shell-and-pearl pixel-art board has a large background-colored area, but the real challenge is the tray beneath it. Purple, pink, blue, and cyan all compete for one dirt path, making timing more important than speed. The active row is a fixed opening sequence that establishes a safe route before the three-by-three source grid begins feeding stacks upward. Breaking the color-delivery dependency—pink before blue, blue before cyan—is the main cause of a stalled run. The white buffer pad and five waiting slots must be preserved for incoming refills, so premature moves can prevent source stacks from rising safely.