
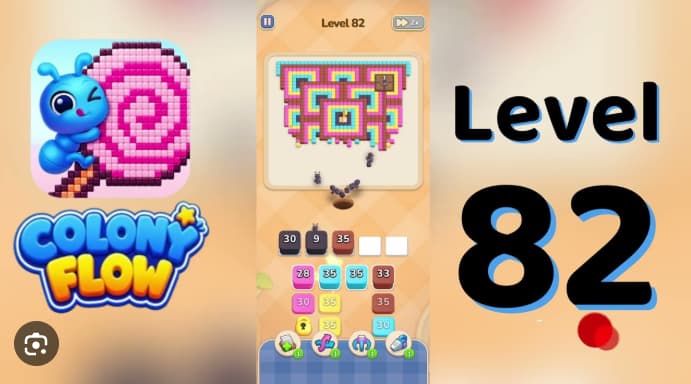














































































































































































Colony Flow Level 82 Walkthrough guides you through one of the trickier puzzle stages in Colony Flow, where pipe placement and resource timing become critical.
This level introduces tighter space constraints and requires you to manage multiple colony connections simultaneously without creating flow bottlenecks. This walkthrough focuses on the most efficient pipe layouts, which resource paths to prioritize first, and where players commonly get stuck.
You’ll find specific tile-by-tile guidance for the opening moves, strategies for managing the mid-game colony expansion, and solutions for the final connection sequence that trips up most players on their first attempt.
Colony Flow Level 82 Walkthrough
Colony Flow Level 82 requires a strict release order because purple screen cells, brown rails, cyan D-pad pieces, pink buttons, and gray bumpers all share one ant hole. The key is clearing the four active-row stacks—purple 3, brown 5, cyan 21, brown 21—before touching either source row. Releasing the cyan 35 from source row 1 too early blocks the D-pad route, while tapping pink stacks before cyan clears can strand pink ants on remaining button cells.
Keep the fifth active-row cell (the white buffer pad) empty throughout the early sequence. Late white, gray, and green refills use that slot to complete the screen face icon, bumper buttons, and TOP GAMMER wordmark.
How to Play Colony Flow Level 82 - Full Solution
Use one beat of delay between taps when noted, allowing each ant wave to enter and clear the shared dirt path before the next color follows.
-
Tap purple 3 in active-row cell 1. Wait one beat for purple ants to clear the lower edge of the screen before tapping the next stack.
-
Tap brown 5 in cell 2 and wait one beat. Brown ants clear the side rails. Tap cyan 21 in cell 3, wait another beat, then tap brown 21 in cell 4. This clears the brown rails and cyan D-pad in the safe order without blocking the shared path.
-
Leave the fifth active-row cell (the white buffer pad) empty.
-
Once the active row has drained, release source row 1 in this order, with one beat between each tap:
- purple 28
- cyan 35
- pink 30
-
Clear source row 2 only after source row 1 has dispatched:
- pink 35
- cyan 30
- pink 30
- cyan 24
Do not manually fill the white buffer pad. Late refills use that space to finish the remaining screen, bumper, and wordmark sections.
Common Mistakes
-
Firing cyan 35 before draining the active row. This sends cyan ants across purple screen cells that purple still needs to clear, stalling them on remaining D-pad cells and blocking later cyan waves.
-
Tapping pink 30 stacks while cyan ants are still walking the dirt path. Pink ants strand on remaining face-button cells and block the pink 35 in source row 2.
-
Filling the white buffer pad with a source-row click. This strands the late white, gray, and green refills, leaving the screen face icon, bumpers, and wordmark empty.
Tips
-
Drain the opener queue first. The required active-row order is purple 3, brown 5, cyan 21, brown 21. These four stacks clear the screen perimeter before source-row refills enter.
-
Treat source rows as locked supply. Do not release source row 1 until all four active-row stacks have cleared. Do not touch source row 2 until source row 1 is complete.
-
Respect the shared path. Every color uses the same ant hole and dirt route. A short pause between waves prevents the next stack from entering a blocked path.
-
Protect the fifth-cell buffer. Leaving the white pad open is essential for late white, gray, and green cleanup refills.
Related Games
- Colony Flow Level 35 Walkthrough — This earlier Colony Flow puzzle guide offers another color-wave routing challenge for players who want to practice the tap timing and active-row management used in Level 82.
- Colony Flow Level 23 Walkthrough — Level 23 is a useful follow-up for mastering the same ant-path sequencing mechanics, including avoiding blocked refill stacks while clearing a themed pixel-art board.
Enjoy!