
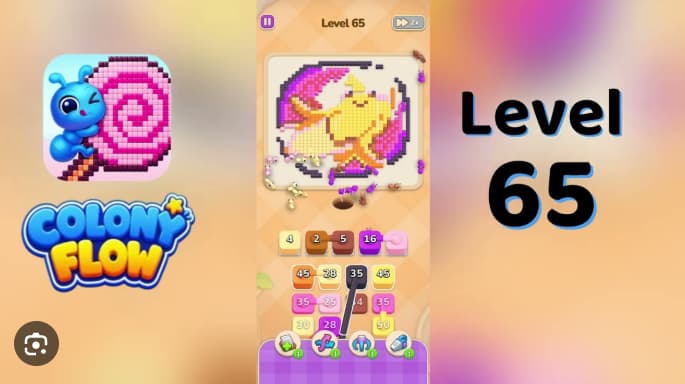














































































































































































Colony Flow Level 65 Walkthrough guides you through one of the game’s trickier puzzle stages, where managing colony resources and traffic flow becomes significantly more complex.
This level introduces tighter space constraints and faster-paced decision-making that can stall progress if you don’t understand the core mechanics. This walkthrough focuses on the essential strategies for Level 65: optimal placement patterns, resource prioritization, and common bottlenecks that trip up most players.
You’ll get the clearest path through the level without unnecessary detours, along with specific tips for handling the unique flow challenges this stage introduces.
Colony Flow Level 65 Walkthrough
Colony Flow Level 65 is a yellow-chick board where brown outline, yellow body, orange beak, and red wing tips share one dirt path. The brown 18 opener frames the chick before the red 42 accent wave is sent. Tap the five-cell active row first—brown 18 in cell 3, then yellow 40 in cell 1, yellow 26 in cell 2, brown 41 in cell 4, and orange 24 in cell 5—leaving one beat between taps so the brown outline and yellow head clear before the body and beak waves arrive.
Once source rows rise, walk them left to right: orange 45, orange 28, red 42, purple 25 in row 1; pink 35, pink 25, yellow 45 in row 2; beige 30, yellow 28, pink 25, yellow 35 in row 3. Tap late refill waves only when they enter the empty white buffer pad.
Step-by-Step Solution
Active row (no buffer pad at start):
- Tap brown 18 in cell 3. Brownants walk the dirt path to the brown outline along the chick’s bottom edge. Wait one beat for the lowest outline cells to clear before tapping the next stack.
- Tap yellow 40 in cell 1. Yellow ants start clearing the head. Leave one beat between brown and yellow so the outline is mostly cleared before the head wave arrives.
- Tap yellow 26 in cell 2. Yellow ants continue clearing the body. Leave one beat so the head is at least half-cleared.
- Tap brown 41 in cell 4, then orange 24 in cell 5. Brown finishes the outline wrapping the chick silhouette; orange starts clearing the beak. Leave one beat between waves so the yellow body is mostly cleared before the beak route opens.
Source row 1:
- Tap orange 45 in cell 1 as it rises into the active row, then orange 28 in cell 2, red 42 in cell 3, purple 25 in cell 4. Orange clears the beak and ant-trail accents, red clears the small red wing tips, purple starts clearing the purple wing shading. Leave one beat between waves so the yellow body is at least half-cleared before red and purple accents start.
Source row 2:
- Tap pink 35 in cell 1, pink 25 in cell 2, pink 25 in cell 3, yellow 45 in cell 4. Pink clears the oval background behind the chick; yellow clears the last body and wing cells. Leave one beat between waves so the body is mostly cleared before the pink background route opens.
Source row 3:
- Tap beige 30 in cell 1, yellow 28 in cell 2, pink 25 in cell 3, yellow 35 in cell 4 as each rises into the active row. Yellow clears the last wing cells, pink finishes the oval background. Late refill waves begin rising into the empty white buffer pad that surfaces in the active row.
Refills:
- Tap late red, purple, pink, orange, brown, and yellow refill waves as they rise into the empty buffer pad. Each refill clears the next wing-tip cell, purple shading cell, pink background cell, or outline cell. The board clears once the last matching cube is routed off.
Colors: Yellow, Brown, Orange, Red, Purple, Pink
Common Mistakes to Avoid
- Firing red 42 before the chick perimeter is cleared. If you tap red 42 in source row 1 before the brown 18, yellow 40, yellow 26, brown 41, and orange 24 active-row waves have cleared the perimeter, red ants cross the wing that yellow still needs to clear and stall on the remaining red tip cells, blocking late red refills.
- Tapping pink 35 while yellow ants are still on the dirt path. If you tap pink 35 in source row 2 while yellow is still walking up to the body, pink ants strand on the remaining oval background cells and block the pink 25 stacks that need to finish the background.
- Letting purple 25 rise too early. If purple 25 in source row 1 rises before the yellow body is at least half-cleared, purple ants strand on the remaining wing shading cells and block late purple refills.
Quick Tips
- Tap brown 18, yellow 40, yellow 26, brown 41, and orange 24 from the active row before touching orange 45 in source row 1, red 42, or pink 35 in source row 2. Brown outline and yellow body are the two highest-traffic regions and must clear together before red wing tips, purple shading, or pink background enter the dirt path.
- Treat the active row as the opener queue and 3-row, 4-column source grid as supply. The active row has no empty buffer slots at the start, so drain brown 18 first, then yellow 40 and yellow 26, then brown 41 and orange 24, before walking source rows 1, 2, and 3 left to right.
- Save red 42 in source row 1 and pink 35 in source row 2 for mid-game. Red wing tips and pink oval background are two of the smallest color regions. A premature red or pink tap strands those ants on remaining accent cells and blocks late refill waves that rise into the empty white buffer pad.
Related Games
- Colony Flow Level 42 Walkthrough — Continue with this nearby high-numbered puzzle guide for another late-game board that demands careful stack timing and route management.
- Colony Flow Level 41 Walkthrough — This walkthrough offers a similarly advanced Colony Flow challenge for players practicing ordered color-wave releases before tackling Level 65.
Enjoy!