
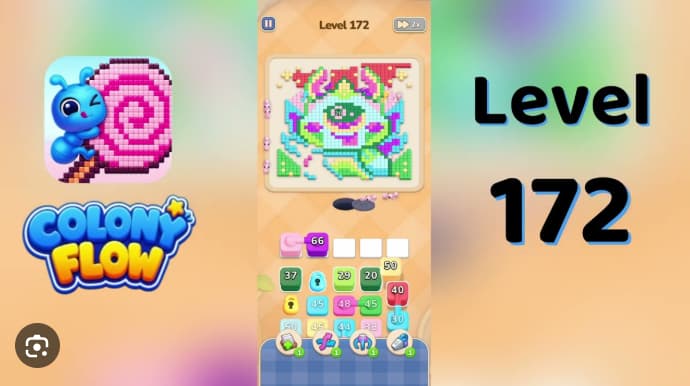














































































































































































Colony Flow Level 172 presents a smiling green frog-like portrait behind a red checker frame, where locked keyhole rows create a challenging puzzle sequence.
This walkthrough breaks down the exact play sequence and mechanics you need to clear Level 172 efficiently, focusing on the keyhole unlock pattern and color-specific moves that make this stage work.
Colony Flow Level 172 Walkthrough
Colony Flow Level 172 is a green frog-like portrait inside a red checker frame. Its blue and yellow keyhole rows lock deeper cards, making timing the central challenge: build the outer traffic loop first, wait for perimeter space before opening the purple face route, and save the lime edges for the late finish.
The board opens with pink 45, cyan 40, pink 30, pink 50, and yellow 50 visible. Below them sit red 40, yellow 45, purple 101, green 20, red 40, then green 37, green 40, lime 29, green 20, and cyan 30, blocked by keyhole tiles. Five white buffer pads are empty.
The goal is to route all colors through the central hole—red and pink from the checker background, cyan from the cheks and side panels, green from the face and lower corners, purple from the ears and mouth, and yellow from the highlights.
The clear requires the small dark-green face, pale-cyan top pixels, two lime side strokes, and green 40 to reach the hole.
How to Play Colony Flow Level 172 - Step-by-Step Solution
Build the outer loop. Start with pink 45, cyan 40, pink 30, pink 50, and yellow 50. The active wave becomes pink 33, red 28, cyan 35, red 41, and green 36. Let this group complete its perimeter loop before opening locked routes.
Hold the keyholes. Do not tap the blue or yellow keyholes or purple 101 while red and pink traffic occupies the top edge. Opening these routes fills the five buffer pads and can block the central hole before face cleanup is ready.
Feed the lower corner. As room opens, send yellow 20/14/11/4, green 2/9/15, lime 13/5/1, and red 25/23/19. Pause if green traffic blocks the central route.
Clear the purple face section. Once the cyan cheek traffic is moving and redants have left the top perimeter, route purple 72, then 63, 52, 49, and 33. Follow with purple 25/22/18, pink 22/13/6, yellow 4/2/1, and cyan 38/33/9. Keep one buffer pad free for late cyan and pink groups.
Cross the bottom edge. Let pale-cyan 31/26/9 and remaining pink and purple cards cross the bottom before adding another large green card, so the eye and mouth pieces do not strand on opposite sides.
Finish the fragments. Route yellow 1, cyan 12/11, green 14/13, and pink 9/7/3 one at a time. Each small group uses the same central hole. End with green 40, then wait for the two lime side strokes, pale-cyan top pixels, and tiny green center square to clear before the victory transition.
Common Mistakes
- Opening the blue or yellow keyholes early disrupts the pink/red/cyan outer loop while the top perimeter is crowded.
- Using purple 101 or purple 72 at the start fills all five buffers before the shared hole is available.
- Sending large green cards during face cleanup can split eye and mouth pieces across opposite sides if pale-cyan, pink, and purple traffic has not crossed.
- Stopping after the checker background disappears. The portrait is not complete until green 40, both lime side strokes, pale-cyan top pixels, and the small green center square are gone.
Related Games
- Colony Flow Level 33 Walkthrough — Follow this guide for another Colony Flow puzzle centered on sequencing colored groups through limited shared routing space.
- Colony Flow Level 35 Walkthrough — This nearby walkthrough is useful for players who want more practice planning safe card-release orders and avoiding blocked paths.
Why Does Timing the Keyhole Rows Matter?
The video establishes the pink/red/cyan outer loop with pink 33, red 28, cyan 35, red 41, and green 36 before revealing the blue and yellow keyholes. Clicking toward them early consumes staging space while the perimeter is still full. Purple 72becomes safe once red ants have left the top edge and cyan chek traffic is moving. The pale-cyan top pixels, two lime side strokes, tiny green square, and green 40 stack remain after the frog-like face shrinks—these fragments are the real finish, not optional decoration.