














































































































































































Colony Flow Level 33 Walkthrough guides you through one of the puzzle game’s most challenging stages, where you must connect matching colors across increasingly complex grid patterns while managing limited moves.
This level introduces tighter space constraints and overlapping flow paths that require careful planning to solve without blocking yourself into dead ends. This walkthrough focuses on the optimal move sequence, critical path priorities, and common mistakes that waste moves.
You’ll find specific guidance on which color pairs to connect first, how to manage the colony grid’s corner restrictions, and where to route flows to preserve space for the final connections.
How to Play Colony Flow! Level 33
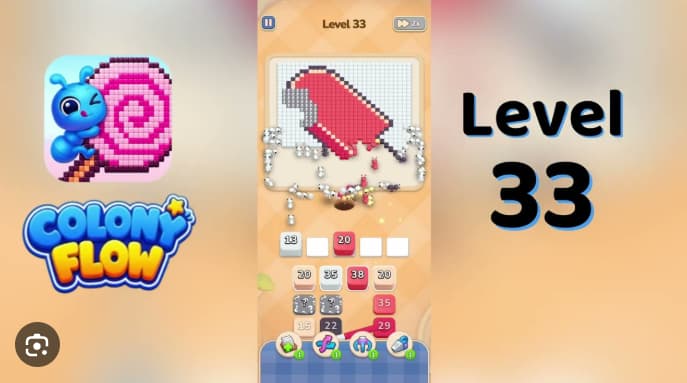
Colony Flow! Level 33 is a hammer-shaped board with a chunky red head, dark red accent stripes, a yellow handle pointing toward the lower right, and a thin gray outline. All colors share one ant hole and dirt path. The 5-cell top row includes two empty white buffer slots that must stay open for rising refill stacks. Tapping stacks in the wrong order can strand ants behind traffic or block refills from reaching the active queue.
When two colors share the dirt path, send one wave and wait a beat for its ants to clear the bottleneck near the bottom of the artwork before tapping the next stack. Treat the top row as working space, not storage—filling buffer slots too early stalls the route.
How to Solve Colony Flow! Level 33 — Full Walkthrough
Clear the gray outline and yellow handle before the red head stacks.
Tap gray 12 in top-row cell 1.
Gray ants drain the thin dark gray outline wrapping the hammer. Wait for the first wave to clear the bottom edge of the art.
Tap gray 32 in top-row cell 2.
This drains the soft white/gray background cells around the head. Leave one beat between gray waves to avoid traffic stalls on the shared route.
Tap yellow 15 in top-row cell 3.
Yellow ants start clearing the handle. Keep both white buffer slots open while gray and yellow traffic is active.
Wait for opening waves to move through, then tap the dark red 18 refill.
As dark red stacks rise into the top row, tap them in order:
- dark red 18
- dark red 20
- dark red 9
- dark red 6
These drain the two dark red accent stripes. Leave one beat between yellow and dark red waves.
Tap yellow 10 from source row 1, cell 2.
This finishes the yellow handle.
Clear the red hammer head.
Once the outline and handle are mostly gone, tap:
- red 20(source row 1, cell 1)
- red 40 (source row 1, cell 3)
- red 20 (source row 2, cell 1)
- red 35 stacks as they rise from source rows 2–4
Leave one beat between red and dark red traffic. Do not tap red 40 or the source-row-2 red 20 while gray ants are still on the route—doing so blocks later refills.
Finish late refill stacks.
Tap the gray 14 from source row 3, then the remaining red 35, red 40, red 29, and small red and dark red refills (red 1, dark red 2, dark red 1) as they rise into the buffer slots. The level ends when the hammer artwork is completely empty and the completion banner appears.
Strategy and Quick Tips
- Protect the two white buffer slots. They stage incoming refill stacks. A full top row prevents the next required color from rising.
- Clear gray and yellow first. The outline, background, and handle are the highest features of the hammer. Draining them opens the route for red and dark red.
- Send one shared-route wave at a time. Wait for the lane near the bottom edge to clear before starting the next color.
- Save large red stacks for mid-game. Tapping red 35, red 40, or red 29 while gray or yellow ants are still on the path strands red ants on the head and blocks refills behind them.
- Watch the artwork, not just the tray. An empty-looking source grid does not mean the level is finished. Late small refills may still be waiting to rise.
Common Mistakes to Avoid
- Filling buffer slots with red 20, red 40, or dark red 18 before gray12, gray 32, and yellow 15 have drained the outline and handle. This strands red and dark red ants behind active gray and yellow traffic.
- Firing red 40 from source row 1 while gray ants are still walking the dirt path. This blocks the red 35, red 40, and red 29 refills behind it.
- Tapping red 20 from source row 2 before the outline is half-drained. This sends red ants across head cells that larger stacks still need to clear and stalls them on accent stripe cells.
Related Games
- Colony Flow Level 32 Walkthrough — Continue directly from the preceding level for another recent Colony Flow puzzle with comparable queue management and color-routing mechanics.
- Colony Flow Level 31 Walkthrough — Review this nearby late-game walkthrough for additional practice timing ant waves and preserving open buffer slots during refills.
Enjoy!