
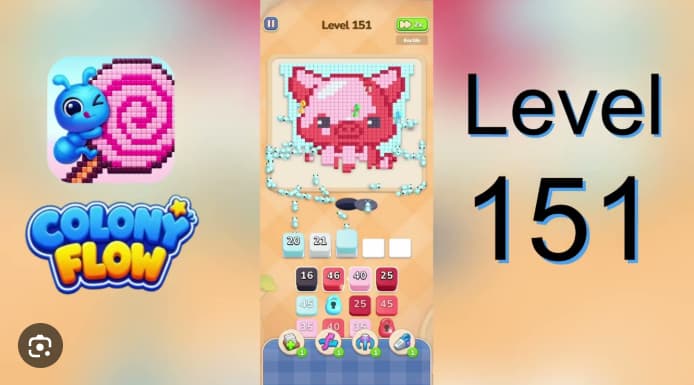














































































































































































Colony Flow Level 151 clears a pink cat portrait by alternating red-pink interior traffic with cyan perimeter sweeps.
The safe opening sequence processes red 50, pink 14, and cyan 45 in controlled batches while protecting five white buffer zones from overflow. This walkthrough breaks down the exact color routing, timing windows, and buffer management needed to complete the level without flooding critical paths.
The guide focuses on the alternating interior-perimeter pattern that defines Level 151’s solution, with specific batch sizes and the order that keeps white buffers stable throughout the clear sequence.
Colony Flow Level 151 Walkthrough
Colony Flow Level 151 clears a pink cat portrait by alternating red-pink interior traffic with cyan perimeter sweeps. The board uses five white buffer slots and a single brown return hole that all routes share.
Tap red 50, pink 14, and cyan 45 as your opening sequence, then add pink 40 and the first red 25 only after cyan has reached the left edge and traveled across the top frame.
The core strategy is keeping one buffer slot open while ants cross the brown hole and letting each cyan group finish its outer loop before feeding another large interior wave.
How to Play Colony Flow Level 151
- Tap red 50 and wait for its counter to fall into the low 40s.
- Tap pink 14, then cyan 45. Wait until cyan reaches the left edge and travels across the top frame.
- Tap pink 40, followed by the first red 25. Leave the second visible red 25 untouched for now.
- Let pink 39 and red 20 drain through the center return lane.
- Once the first queue clears, run cyan 50 → cyan 25, then clear the cyan stacks moving through 48/40. Let each cyan group finish its outer loop.
- Tap white 21, red 42, and pink 35 after the cyan route is clear.
- Continue the active interior sequence as buffer slots open: 29/31/21/39 → 22/31/15/32.
- Save black 16, red 7, and pink 5 for the final pass. Tap each only after the prior group has reached and cleared the brown hole.
Common Mistakes
Tapping both red 25 stacks before cyan 45 opens the perimeter. This fills the five bufers and jams the lower red shirt lane, leaving cyan pixels stranded on the frame.
Starting pink 35 while cyan ants cross the top edge. Both routes share the brown return hole, blocking pale cap pixels and frame traffic in the same lane.
Clicking red 7 or pink 5 while the previous group is at the brown hole. The last buffer slot will sit on top of unfinished perimeter traffic instead of clearing the final lower-cat fragments.
Tips for Level 151
- Keep one white buffer slot empty whenever ants are crossing the brown return hole.
- Use visible movement as your timing cue: wait for cyan to reach the outer frame before selecting the next interior stack.
- Let cyan 45 and the later cyan 50/25/48/40 sequence complete an outer loop before feeding another red wave.
- Save red 7 and pink 5 for the end; they clear the remaining lower-cat pixels once the larger lanes have drained.
Related Games
- Colony Flow Level 50 Walkthrough — Continue practicing the staged color-batch timing and limited-buffer management needed to prevent perimeter routes from blocking interior traffic.
- Colony Flow Level 45 Walkthrough — This earlier puzzle offers another useful Colony Flow route-planning challenge for players learning when to wait for ants to clear before opening the next stack.
What opener should I use?
Tap red 50, pink 14, and cyan 45 first. Add pink 40 and red 25 only after cyan has wrapped around the left and top edges. Cyan is the batch that opens the outer frame before the cat interior gets crowded.